
Quick Summary
Professional crawl space moisture barrier installation is essential for Austin homeowners to prevent mold growth and structural decay caused by the region's intense humidity. Super Green Insulation Austin provides commercial-grade 20-mil vapor barrier solutions and expert sealing of all seams and terminations to ensure long-term moisture control and code compliance. Property owners can protect their structural integrity and improve indoor air quality by requesting a professional crawl space inspection or a free estimate from Super Green Insulation Austin today.
Crawl Space Moisture Barrier Installation That Stops Mold and Rot Fast
Crawl space moisture barrier installation is one of the fastest ways to cut off damp air, standing water, and the mold growth that can quietly damage a home. In Austin, many professional jobs start with a same-day or next-day inspection, and the price depends on crawl space size, existing damage, and how easy the space is to reach. If you are dealing with musty odors, soft wood, or high indoor humidity, the problem usually does not stop at the crawl space. In Central Texas, a sheet of plastic on the ground is rarely enough. You need a sealed, code-aware moisture barrier installed by licensed and insured specialists who understand how heat and humidity behave below the home.[2]
That is where Super Green Insulation Austin comes in. Our team handles urgent moisture problems with 24/7 emergency service, 30- to 60-minute on-site evaluations, and upfront pricing with no hidden fees, so you can move quickly and know what you are paying for. Homes with sealed crawl spaces in humid climates can reduce mold presence by 70% within 6 months, but only when the barrier is installed correctly and every seam, pier, and access point is sealed. If you want a free estimate or a professional crawl space inspection, you can request one online now.[1]
What Crawl Space Moisture Barrier Installation Costs, Includes, and How Fast It Gets Done
What Crawl Space Moisture Barrier Installation Costs, Includes, and How Fast It Gets Done in brief: Crawl space moisture barrier installation in Austin typically costs $1,500 to $5,000 and takes 1 to 2 days for a professional crew. The job includes laying a heavy-duty vapor barrier, usually 20 mil, sealing all seams and wall terminations, and checking drainage. A proper installation helps control ground-level vapor migration, reducing humidity-driven mold, wood rot, and musty odors in Austin homes.
A professional moisture barrier project usually ranges from $1,500 to $5,000, though the final moisture barrier cost depends on square footage, cleanup, and access. Licensed crews often finish the work in one to two days. Super Green Insulation Austin provides 30- to 60-minute response times for free on-site inspections, with transparent vapor barrier pricing provided up front.
Unsealed dirt floors let soil vapor rise into the crawl space, which pushes humidity higher and can lead to condensation, wood rot, and mold. Vapor barriers help block ground moisture from entering the air and support lower humidity levels, which protects structural materials from decay. For code compliance, the barrier should have a permeability of 0.1 perm or less, which is Class I. In crawl spaces with less than 1 square foot of ventilation for every 150 square feet of area, a vapor retarder is required.[4]
Our vapor barrier installers do more than lay plastic. A proper moisture barrier repair or new install usually includes three core steps:
- Clearing debris and leveling the dirt surface.
- Taping all seams so vapor cannot move through overlaps.
- Securing the liner at wall terminations to seal the crawl space edge.
What You Will Need – Materials and Tools for Professional-Grade Results
What You Will Need – Materials and Tools for Professional-Grade Results in brief: For crawl space moisture barrier installation you need a 20-mil reinforced crawl space liner, seam tape rated for polyethylene, mechanical fasteners or adhesive for wall terminations, a utility knife, measuring tape, PPE, and a hygrometer. Code-compliant barriers must have a permeability of 0.1 perm or less, which is Class I.
Once the price range is clear, the next step is understanding the materials involved. A lasting installation calls for a 20-mil liner, polyethylene seam tape, and mechanical wall fasteners. These materials are there to control vapor migration from the ground, not just cover dirt.
When comparing moisture barrier cost and vapor barrier pricing, avoid thin 6-mil plastic. It tears more easily and is more likely to lead to future moisture barrier repair. A barrier that meets code should have a permeability of 0.1 perm or less. Also, if a crawlspace has fewer than 1 square foot of ventilation for every 150 square feet of area, it requires a vapor retarder. Professional vapor barrier installers like Super Green Insulation Austin supply commercial-grade 20-mil liners and handle material sourcing for you.
| Essential Material | Professional Purpose |
|---|---|
| 20-Mil Reinforced Liner | More durable than 6-mil visqueen and built for long service life, often 20+ years when installed and maintained properly. |
| Seam Tape & Fasteners | Bonds polyethylene and secures wall terminations tightly. |
| Hygrometer & PPE | Checks humidity levels and keeps the crew safe during installation. |
Step 1: Inspect the Crawl Space for Standing Water, Mold, and Structural Damage
Before crawl space moisture barrier installation begins, the area should be checked for standing water, leaks, and mold. Skipping this step traps problems under the plastic and can speed up wood rot instead of preventing it.
- Check for saturated soil and active plumbing leaks.
- Inspect floor joists and subfloor sheathing for visible mold.
- Identify pest damage or contaminated old insulation.
If the crawl space already has water intrusion or major damage, the barrier should not go in until those issues are addressed. A well-built encapsulation system can protect a home for 20+ years when it is installed correctly and maintained with care.
Super Green Insulation Austin offers a free crawl space inspection to spot hazards early. Avoid inexperienced vapor barrier installers. A careful inspection helps make sure your moisture barrier cost is based on the real work needed, not on guesswork.
Step 2: Clear Debris, Level the Ground, and Prep the Surface
Once the inspection confirms the space is free of active leaks, the next step is clearing debris and leveling the soil. Proper surface prep helps keep sharp objects from puncturing the new plastic and removes low spots where moisture can collect, so the liner lies flat and blocks vapor migration.
To get the best results from professional vapor barrier installers and reduce the chance of future moisture barrier repair, complete these preparation steps:
- Remove hazards: Clear out rocks, construction debris, fallen insulation, and any degraded plastic.
- Level the ground: Knock down high spots and fill depressions. Wrinkles and voids under the liner can create hidden pockets where condensation collects and mold grows.
- Grade for drainage: Slope the soil toward an existing sump pump or drain point if the crawl space setup allows it.
Proper prep can affect vapor barrier pricing, but it is worth it. A liner installed over uneven soil is more likely to fail early, which raises long-term moisture barrier cost.
Step 3: Lay the 20-Mil Vapor Barrier and Overlap Seams Correctly
With the ground leveled, laying the 20-mil vapor barrier means unrolling the plastic across the floor and extending it 6 to 12 inches up the foundation walls. Professional vapor barrier installers also overlap seams carefully so ground-level vapor does not sneak through the joints.
Simply covering the dirt is not enough. Real protection comes from sealing moisture at every surface. For a successful crawl space moisture barrier installation, follow these steps:
- Unroll and overlap: Spread the heavy-duty liner across the entire floor, ensuring at least a 6-inch overlap at every seam.
- Extend up the walls: Run the plastic 6 to 12 inches up the foundation. Skipping this wall termination step often leads to future moisture barrier repair.
This is one of the biggest differences between a quick patch and a real moisture control project. A thicker liner and properly taped seams cost more up front, but they do a better job of protecting structural wood over time.
Step 4: Seal Every Seam, Pier, and Penetration Point
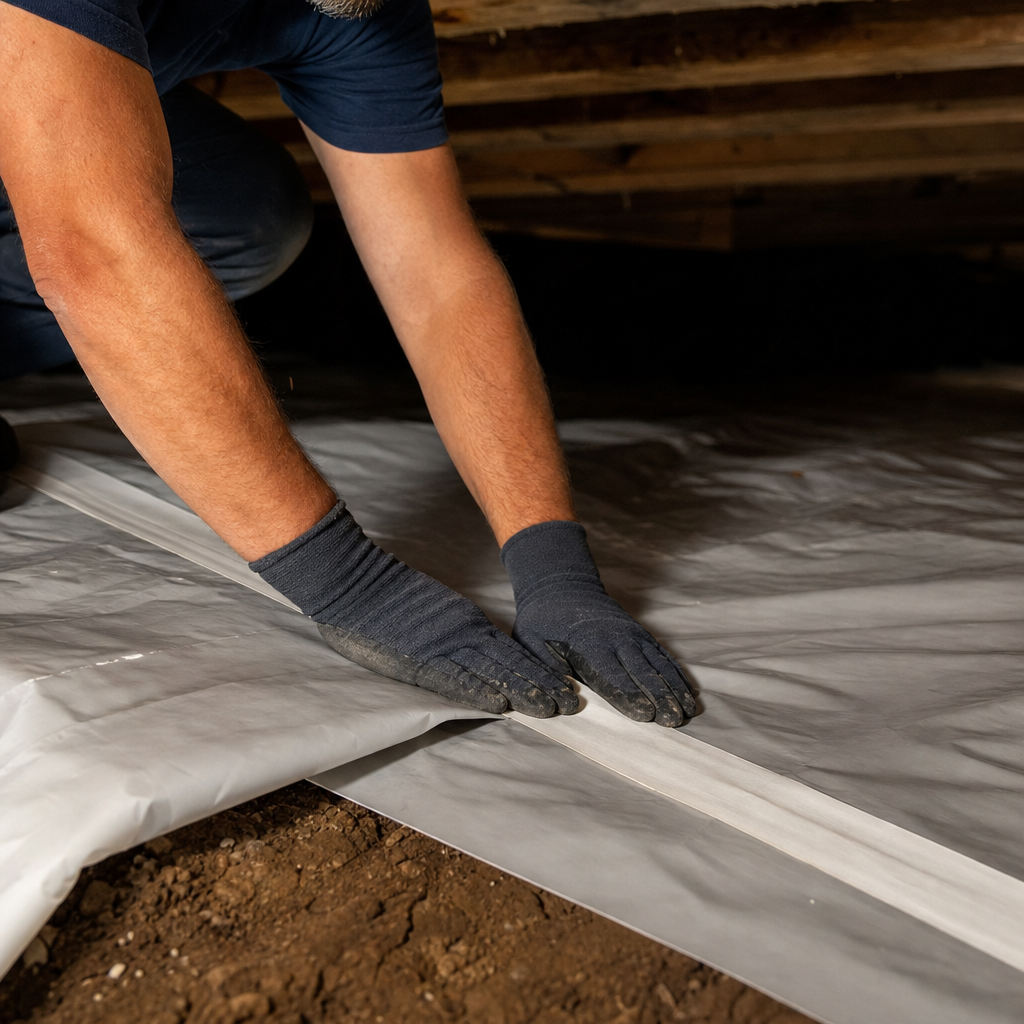
Sealing every seam, pier, and penetration point is the most important part of blocking ground-level humidity. Without polyethylene-rated seam tape, vapor can move around the plastic and weaken the barrier. Careful sealing is what separates a professional crawl space moisture barrier installation from a short-term patch.[5]
Most online guides stop after the plastic is laid down, but in Austin’s humid climate, vapor will always look for the easiest path. To avoid early moisture barrier repair, follow these sealing steps:
- Tape all overlaps: Secure seams with specialized polyethylene tape. Standard duct tape breaks down quickly in damp conditions.
- Seal penetrations: Cut the liner tightly around support piers, columns, and plumbing pipes, then tape every edge directly to the plastic.
Experienced vapor barrier installers know that careful taping is what supports real humidity control. It also helps reduce the chance of musty odors and mold growth moving up into the living space.
Step 5: Secure Wall Terminations and Seal the Crawl Space Access Door
Securing wall terminations with mechanical fasteners and sealing the crawl space access door keeps humid outside air from bypassing your new liner. An unsealed hatch can undo the entire crawl space moisture barrier installation, letting damp drafts in and triggering costly moisture barrier repair.
Professional vapor barrier installers know that securing wall terminations and access hatches separates a real moisture solution from simply covering the dirt. Super Green Insulation Austin technicians secure every termination point and seal access doors as a standard part of the job, not as an add-on.
- Fasten the barrier: Attach the liner to foundation walls using masonry-rated construction adhesive or mechanical fasteners to prevent slipping.
- Seal the access door: Install heavy-duty weatherstripping and a gasketed cover on the hatch to block exterior air.
When the access point is left open, the crawl space can keep pulling in moist outdoor air. A sealed hatch helps the barrier do its job and supports better humidity control throughout the home.
Step 6: Verify Humidity Levels and Confirm Drainage Performance
After sealing the access door, verify your crawl space moisture barrier installation by measuring relative humidity at 24 and 72 hours after install. Aim for humidity levels below 60% and make sure no water pools on the liner after rain. That helps prevent future moisture barrier repair.
Indoor relative humidity should stay below 60 percent to help prevent mold growth. Checking this confirms real value from your moisture barrier cost. If humidity stays high after the barrier is in place, drainage or ventilation may need more attention.
To get the most from your investment, confirm these final metrics:
- Measure humidity: Check the hygrometer at 24 and 72 hours to confirm vapor levels are dropping.
- Check for pooling: Inspect after a rain event. Water on top points to a drainage problem that needs attention.
- Maintain the system: A well-built encapsulation system can protect a home for 20 or more years when properly maintained.
Vapor Barrier vs. Full Crawl Space Encapsulation – Which Does Your Austin Home Need?
Vapor Barrier vs. Full Crawl Space Encapsulation – Which Does Your Austin Home Need? in brief: A vapor barrier is a ground-cover liner that blocks soil moisture. Full crawl space encapsulation seals the floor, walls, and sometimes the ceiling, often adding a dehumidifier and sealed vents. In Austin, if your crawl space shows persistent humidity above 60%, active mold, or contains HVAC ducts, full encapsulation is the stronger investment. A vapor barrier alone works well in dry crawl spaces with good drainage and no mold history.
A vapor barrier covers the soil, while full encapsulation seals the floor, walls, and vents, often with a dehumidifier added. If your home has HVAC ducts below or persistent dampness, encapsulation is usually the better fit.
Unsealed crawl spaces can increase structural wood moisture content, which raises the risk of decay. At Super Green Insulation Austin, our on-site assessments identify what your Central Texas home needs without unnecessary upsells. For dry, well-drained spaces, our licensed team provides standard crawl space moisture barrier installation. If humidity stays high, encapsulation can reduce the need for repeated moisture barrier repair.
| Feature | Basic Vapor Barrier | Full Encapsulation |
|---|---|---|
| Coverage Area | Ground only | Floor, walls, sealed vents |
| Best For | Dry, well-drained spaces | High humidity, active mold, HVAC ducts |
| Climate Control | Passive | Active dehumidification |
| Austin Price Range | $1,500 – $3,000 | $5,000 – $15,000 |
Comparing vapor barrier pricing with full encapsulation moisture barrier cost helps you plan your budget. Before hiring generic vapor barrier installers, contact our local specialists for a transparent, code-compliant evaluation.
How to Choose the Right Moisture Barrier Installer in Austin
Choosing the right moisture barrier installer in Austin means prioritizing local specialists who understand Central Texas vapor migration over general handymen or national franchises. Always verify Texas licensing, bonding, and insurance, and ask for upfront vapor barrier pricing only after a physical crawl space inspection.
Austin’s high humidity calls for code-aware work. General contractors often miss critical wall terminations, which can lead to expensive moisture barrier repair. Correct crawl space moisture barrier installation can also reduce long-term structural maintenance costs.
When comparing professional vapor barrier installers, look for transparency and verified technician background checks. Super Green Insulation Austin sets the local standard with 16 years of Austin-specific experience, 24/7 emergency service, and a 30- to 60-minute response time for active moisture crises. We make sure your moisture barrier cost is itemized with zero hidden fees. Never accept quotes from contractors who skip physical inspections. Call for a free estimate or request a professional crawl space inspection online today.
Frequently Asked Questions About Crawl Space Moisture Barrier Installation
Frequently Asked Questions About Crawl Space Moisture Barrier Installation in brief: Crawl space moisture barrier installation in Austin costs $1,500 to $5,000 for a vapor barrier and $5,000 to $15,000 for full encapsulation. The best thickness is 20-mil reinforced polyethylene. A properly installed barrier helps prevent mold and wood rot by blocking ground moisture. Professional installation takes 1 to 2 days, and a quality system can last 20 or more years with proper maintenance.[3]
A professional crawl space moisture barrier installation controls vapor migration, typically costs between $1,500 and $5,000, and takes a crew one to two days to complete.
- Pricing: The average moisture barrier cost is $1,500 to $5,000. Upfront vapor barrier pricing usually depends on foundation access and cleanup requirements.
- Materials: Commercial-grade 20-mil plastic can last 20 or more years. Thinner 6-mil sheets tear more easily, which can lead to early moisture barrier repair.
- Speed: Installations take 1 to 2 days. Super Green Insulation Austin provides 30- to 60-minute response times for urgent moisture evaluations.
- Effectiveness: A well-installed barrier helps prevent mold and structural wood rot by blocking ground moisture and lowering crawl space humidity.
Request a free crawl space inspection from Super Green Insulation Austin today to protect your property from humidity damage.
Sources
- [PDF] Sealed Crawl Space with Integrated Whole-House Ventilation in a … – energy.gov
- Crawl Space Encapsulation Market Size and Forecast – verifiedmarketresearch.com (2032)
- How Much Does Crawl Space Encapsulation Cost? [2026 Data] | Angi – angi.com (2026)
- Closed Crawl Spaces: From the Mississippi to the Ponderosa, Impacts on Humidity, Energy and Radon – aceee.org (2005)
- Why Use a Vapor Barrier in Your Crawl Space? Benefits Inside! – stellrr.com (2023)
Related reading: Crawl Space Moisture Barrier Cost: Cut Surprises Before You Sign
Related reading: Crawl Space Encapsulation Price – Get a Clear Quote, Not a Guessing Game
Related reading: How to Price Insulation Installation Without Surprises
Frequently Asked Questions
Does a moisture barrier installation eliminate the need for a dehumidifier in Austin homes?
A high-quality 20-mil barrier from Super Green Insulation Austin significantly reduces ground vapor, but homes with existing drainage issues or HVAC ducts in the crawl space may still require a dehumidifier for total humidity control. Our team evaluates your specific moisture levels during a professional crawl space inspection to determine if a barrier alone meets local code and comfort needs.
Can a moisture barrier be installed if there is currently standing water or active mold in the crawl space?
No, all standing water must be drained and mold must be remediated before Super Green Insulation Austin begins the installation to avoid trapping moisture against your floor joists. We provide comprehensive evaluations to identify these issues early, ensuring your vapor barrier pricing includes the necessary prep work for a permanent, rot-free solution.
How does a professional moisture barrier installation affect the resale value of an Austin property?
A code-compliant, 20-mil installation by Super Green Insulation Austin adds significant value by providing documented proof of structural protection and mold prevention to potential buyers. Many inspectors look for professional-grade vapor barriers as a sign of a well-maintained home, making it a wise investment for long-term property health.
About the author
 |
Sarah Jenkins Sarah Jenkins is an insulation specialist with over 8 years of experience in residential and commercial energy efficiency. Holding a Bachelor of Science in Environmental Science from Texas A&M University, she focuses on practical solutions for climate control in Central Texas. Her expertise lies in rapid-response attic and crawl space restoration, helping Austin property owners reduce utility costs and improve indoor comfort. |