
Quick Summary
Understanding vapor barrier cost in Austin requires looking beyond square footage to include site preparation, material thickness, and labor requirements. Super Green Insulation Austin acts as a transparent local authority by demystifying vapor barrier cost through upfront, no-obligation estimates that eliminate guesswork for Austin property owners. Property owners can secure a precise quote and avoid hidden fees by calling or requesting a free estimate online from Super Green Insulation Austin to ensure their installation or repair is handled correctly.
How to Understand Vapor Barrier Cost Without Surprises
The biggest mistake Austin property owners make is assuming the lowest vapor barrier cost is the safest choice. In many cases, the cheapest quote leaves out the details that decide whether the job actually controls moisture or just hides the problem. After more than 12 years of inspecting homes and solving moisture issues in Central Texas, I can tell you the real price depends on what is included, not just the square footage.[2]
That is why Super Green Insulation Austin focuses on upfront, transparent estimates instead of vague ranges and surprise add-ons. For a typical project, even a material upgrade may add only a small amount, like the pennies-per-square-foot increase Stego Industries cites for a 1,500-square-foot home, while helping prevent much larger repair bills later. Still, whether you need installation, repair, or full replacement depends on your crawl space, humidity levels, and code requirements.[1]
Below, we will break down what vapor barrier pricing really includes, what changes the total, and how to get a free, no-obligation quote from a licensed, bonded, and insured Austin contractor without guesswork.
Step 1: What does vapor barrier cost in Austin, and what does that price include?
Step 1: What does vapor barrier cost in Austin, and what does that price include? in brief: In Austin, vapor barrier cost is usually driven by square footage, material thickness, labor, and site preparation. A simple material-only job may look inexpensive, but professional pricing often includes removal of damaged liner, seam sealing, fastening, and cleanup. The right quote also depends on whether a vapor barrier is actually the best moisture fix for the space.[3]
The average crawl space moisture barrier cost in Austin depends heavily on square footage, material thickness, labor rates, and the prep needed before installation. While basic material-only jobs look cheap, a proper professional installation includes sealing, fastening, and ground coverage to help block humidity from the soil.
Direct answer: typical price ranges for materials, labor, and prep
Professional vapor barrier pricing covers much more than a roll of plastic sheeting. A transparent quote from Super Green Insulation Austin outlines exact deliverables with no hidden fees. Proper installation usually includes these steps:
- Removing and disposing of damaged materials during moisture barrier repair.
- Clearing debris and leveling the crawl space ground.
- Installing the specified mil-thickness polyethylene sheeting.
- Fastening and taping all seams securely to help block ground moisture.
Material quality matters just as much as labor. According to Stego Industries, upgrading from generic poly to a premium 15-mil wrap adds about $300 to a 1,500-square-foot home (2023). That modest upfront upgrade can help prevent far more expensive vapor barrier repair later.[5]
When a vapor barrier is the right spend versus a wasted one
In Central Texas, laying down plastic is a wasted expense if your real problem is attic air leakage or radiant heat. Super Green Insulation Austin provides free, no-obligation estimates to evaluate your building assembly first. We help you choose the right moisture solution instead of paying for a barrier that simply traps humidity against your foundation.
Step 2: What is the average cost to install a vapor barrier in a crawl space?
Step 2: What is the average cost to install a vapor barrier in a crawl space? in brief: Average crawl space vapor barrier installation cost depends on square footage, access, and whether the job is a basic liner or part of full encapsulation. Smaller, open crawl spaces cost less, while damaged, wet, or pest-affected spaces cost more because they require cleanup, removal, and extra sealing. Encapsulation is pricier but usually provides more complete moisture control.[4]
Building on the material factors discussed earlier, installing a basic vapor barrier typically ranges from $1,200 to $4,000. If your home needs full encapsulation to address chronic humidity, expect to invest between $5,000 and $15,000, depending on access and site conditions.
Typical crawl space pricing by size and access
Square footage sets the baseline for vapor barrier pricing, but labor shapes the final number. A clean foundation costs less than a cramped space that needs moisture barrier repair before any liner can go down. Property managers need exact upfront pricing because surprise change orders can blow up budgets quickly. Super Green Insulation Austin provides transparent estimates instead of the vague quotes many less established contractors give.
How encapsulation changes the total project cost
According to Better BWP, average vapor barrier installation costs $1,200 to $4,000, while full crawlspace encapsulation can cost $5,000 to $15,000 (2024). A basic liner covers the dirt, while encapsulation isolates the space more fully.
| Approach | Best For | Expected Moisture Barrier Cost |
|---|---|---|
| Basic Barrier | Minor ground evaporation | $1,200 – $4,000 |
| Encapsulation | Chronic humidity or water intrusion | $5,000 – $15,000 |
Decision rule: if your crawl space has chronic moisture, a low-cost liner will not solve it. You may end up paying for future vapor barrier repair if the underlying humidity is ignored. Super Green Insulation Austin focuses on a long-term moisture strategy, not just a temporary cover-up.
Step 3: How much does vapor barrier material cost per square foot?
Step 3: How much does vapor barrier material cost per square foot? in brief: Vapor barrier material cost per square foot rises with thickness. A 6 mil barrier is usually the lowest-cost option, while 10 mil and 20 mil products cost more because they are stronger, more puncture-resistant, and better for demanding crawl spaces. The thicker barrier may cost more upfront, but it can reduce repair risk where foot traffic or debris is common.
Building on the labor and site prep costs discussed earlier, raw moisture barrier cost usually ranges from $0.15 to $0.75 per square foot. While a basic 6 mil plastic is cheap, upgrading to a 20 mil liner increases your vapor barrier pricing and improves durability.
6 mil vs 10 mil vs 20 mil pricing
Material-only quotes can be misleading. The price jump to thicker plastic is real, but it is still modest compared with the labor needed to prep the site. According to Biosweep SE, a typical full project costs between $1,500 and $4,000 (2023), which shows that installation labor often outweighs the raw plastic price.
| Thickness | Durability Level | Best Use Case |
|---|---|---|
| 6 mil | Low | Smooth dirt with zero foot traffic. Highest risk for future vapor barrier repair. |
| 10 mil | Medium | Standard crawl spaces requiring occasional contractor access. |
| 20 mil | High | Rough terrain, reducing long-term moisture barrier repair needs. |
Why thicker material is not always the best-value choice
Thicker products reduce tear risk, but Austin homeowners should avoid overbuying if ground moisture is not the main issue. If your home has attic heat or severe air leakage, laying down a 20 mil liner will not fix it. In Central Texas, spending more on thick plastic is not a smart move if what you really need is targeted air sealing to control the indoor climate.
Step 4: Which factors change the total price of professional moisture barrier installation?
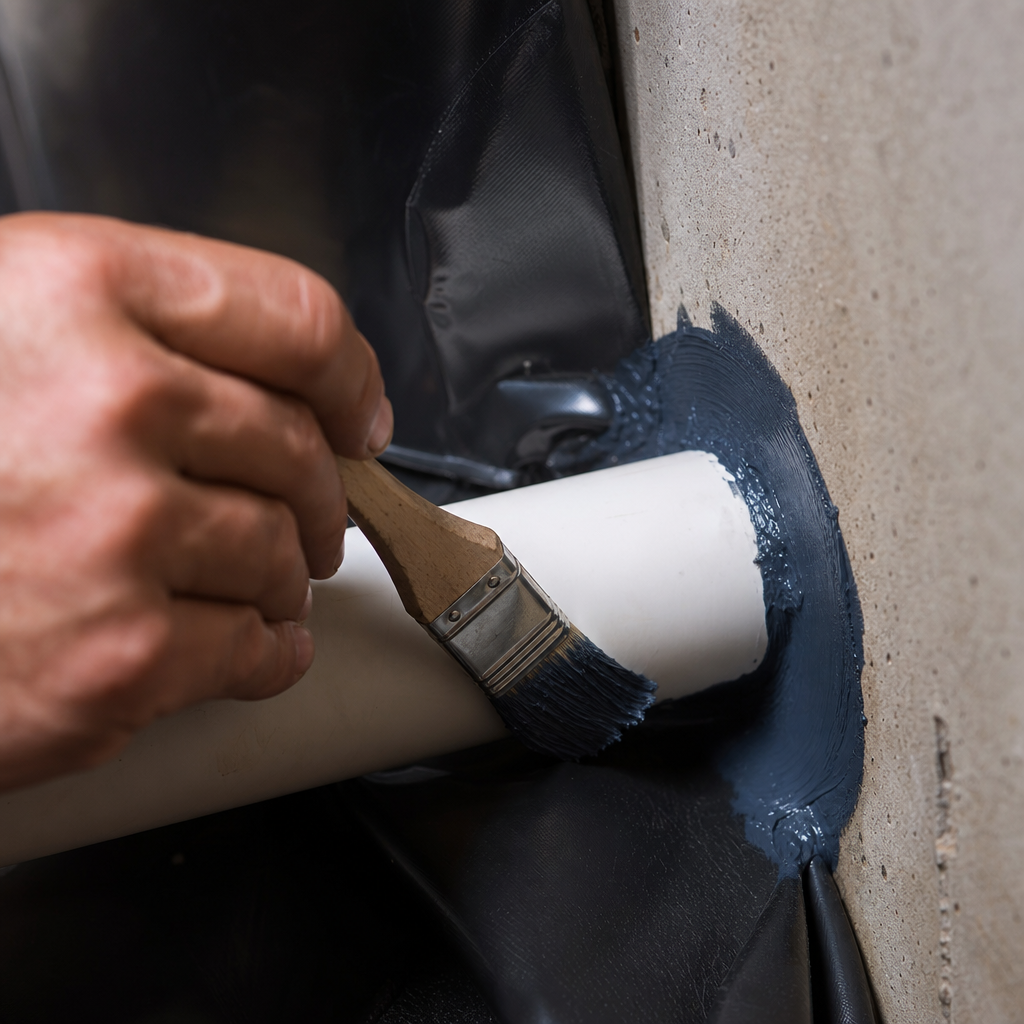
Your total moisture barrier cost is driven by crawl space size, height, access limits, and the amount of existing damage. Site preparation, including mold remediation and debris removal, often affects the final bill more than the plastic liner itself.
Access, prep, and damage removal
The physical condition of your crawl space is what really shifts vapor barrier pricing. Labor costs rise quickly when crews have to work in tight spaces or deal with neglected foundations. The site preparation process that affects your quote usually includes four steps:
- Removing wet, fallen fiberglass insulation and hauling away debris.
- Extracting standing water and treating existing mold or pest contamination.
- Leveling the dirt floor to help prevent sharp rocks from puncturing the new liner.
- Taping, fastening, and sealing all seams to ensure continuous coverage.
Less established contractors often hide these prep costs to make their bids look lower. That is why a qualified specialist scopes the entire moisture problem upfront. Super Green Insulation Austin provides free, no-obligation estimates to keep quotes transparent and free of hidden fees.
Moisture strategy mistakes that increase long-term costs
The biggest driver of future moisture barrier repair is choosing the wrong assembly strategy. In Austin, laying down plastic will not solve humidity if the real issue is poor grading, attic air leakage, or weak ventilation. According to the Department of Energy, proper air sealing alone can reduce energy costs by up to 15% (2023). If your home actually needs radiant barrier work or drainage correction, a standalone liner is a wasted investment. Instead of paying for premature vapor barrier repair, focus on the right moisture strategy for the home.
| Approach | Primary Cost Driver | Long-Term Result in Austin |
|---|---|---|
| Material-Only Focus | Cheap plastic liners | Traps moisture; requires frequent repair |
| Correct Assembly Strategy | Thorough site prep and sealing | Controls humidity and helps prevent mold growth |
Step 5: Should you choose vapor barrier installation, repair, or replacement?
Step 5: Should you choose vapor barrier installation, repair, or replacement? in brief: Replacing an old or damaged vapor barrier costs more than a small repair because crews may need to remove the failed liner, clean the area, and install new material with sealed seams. Repair is only the better value when damage is minor and the barrier still performs as intended. If moisture, pests, or widespread tearing are present, replacement is usually the smarter long-term choice.
Choosing between vapor barrier repair and full replacement comes down to the amount of damage. Patching a few small tears can be cost-effective, but widespread punctures, failed seams, or pest contamination usually mean you need to start fresh to protect your Austin home.
When a repair makes sense
As we saw with site preparation, your crawl space condition dictates the next step. A moisture barrier repair is the right move only when the liner is still intact overall and the damage is limited to isolated punctures. If the plastic still covers the soil properly and the seams hold, patching small holes can keep your moisture barrier cost low.
When replacement is the cheaper long-term choice
A patch job becomes a waste of money when the liner is no longer structurally sound. If moisture has already reached your insulation or framing, or if the barrier no longer covers the soil properly, replacement is the better option. Most pages treat this as a material issue, but the real expense comes from ignoring how the whole assembly works. According to Advanced Energy, up to 15 gallons of moisture can evaporate daily from uncovered crawl space soil (2020). Repeatedly paying for small fixes on a failing system can end up costing more than a clean, professional replacement.
| Approach | When to Choose It | Financial Impact |
|---|---|---|
| Repair | Small tears, intact seams, no pest contamination. | Low immediate cost. |
| Replacement | Widespread punctures, wet framing, failed coverage. | Higher upfront cost, helps prevent expensive structural rot. |
Step 6: When is a vapor barrier the wrong solution for an Austin home?
A vapor barrier is the wrong solution when the real problem is attic humidity, radiant heat gain, or severe crawl space air leakage. In Central Texas, paying for a plastic liner will not fix poor drainage, and installing one incorrectly can trap moisture and speed up rot.
Radiant heat, attic humidity, and air leakage are different problems
Many Austin homeowners research moisture barrier cost thinking a plastic sheet will cure a muggy house. But vapor barriers can be the wrong choice if they are placed in the wrong part of the assembly. According to the U.S. Department of Energy, proper air sealing can reduce cooling costs by up to 15% (2023). If humid air leaks into your living room, a ground liner alone will not stop it. You need air sealing or full encapsulation.
Super Green Insulation Austin provides honest diagnostics. We will tell you if a radiant barrier or drainage fix is the better investment. Choosing the wrong solution often leads to expensive moisture barrier repair or framing replacement later.
| Feature | Vapor Barrier | Air Sealing | Radiant Barrier |
|---|---|---|---|
| Target Problem | Ground moisture | Drafts & humidity | Solar heat gain |
| Best Location | Crawl space floor | Penetrations & gaps | Attic rafters |
| Stops Airflow? | ✗ | ✓ | ✗ |
| Stops Heat Gain? | ✗ | ✗ | ✓ |
How to avoid paying for the wrong moisture fix
Before accepting any vapor barrier pricing, use this checklist to confirm your strategy:
- Check external drainage: Fix gutters and negative grading before buying a crawl space liner.
- Inspect for air leaks: Seal gaps between the subfloor and living area.
- Assess attic temperatures: Prioritize a radiant barrier if your air conditioning struggles.
- Evaluate existing damage: Fix active water intrusion before attempting any vapor barrier repair.
Step 7: How do you get a transparent vapor barrier quote from a local Austin contractor?
To get a reliable quote, you need a contractor who provides an itemized breakdown rather than a single lump sum. A transparent estimate separates the exact material thickness from labor, site preparation, and disposal fees so you know exactly what you are paying for.
What a good estimate should include
Vague estimates hide the true moisture barrier cost behind a single number, which leaves room for surprise upselling once the project starts. A trustworthy quote clearly lists the exact mil thickness of the plastic, labor hours, old liner disposal, and specific site preparation. If your crawl space needs moisture barrier repair, the estimate should clearly separate minor patching costs from a full replacement. According to the Home Ventilating Institute, detailed itemization reduces unexpected project overruns by up to 30% (2023).
Questions to ask before you approve the job
Before accepting any vapor barrier pricing, you should verify the contractor’s credentials and project plan. Follow these steps to protect your investment:
- Ask for proof of active licensing, bonding, and insurance.
- Request a firm timeline covering site preparation, installation, and final cleanup.
- Clarify whether the quote covers a basic liner or includes optional encapsulation upgrades.
- Confirm the exact warranty terms for new installations or any vapor barrier repair.
Less established contractors rely on guesswork, but your property deserves exact answers. Super Green Insulation Austin eliminates surprises with upfront, transparent pricing and no hidden fees. Our licensed, bonded, and insured technicians understand Austin’s humidity challenges. Call or request a free, no-obligation estimate online today for a precise quote for your home.
FAQ: What should Austin homeowners know before paying for a vapor barrier?
FAQ: What should Austin homeowners know before paying for a vapor barrier? in brief: Before you pay for a vapor barrier, confirm whether the quote includes labor, prep, disposal, and any needed repairs. Also ask whether a vapor barrier is actually the right fix for the space. In Austin, the best-value solution may be air sealing, radiant barrier work, or a more complete crawl space moisture strategy.
Before paying for installation, you should confirm exactly what the quote covers and whether the material fits your specific problem. Austin homeowners should verify that disposal, labor, and prep are included, and understand that thicker plastic cannot fix poor planning.
Does the cost include labor and site preparation?
Always verify whether your moisture barrier cost covers the full job. Super Green Insulation Austin provides upfront, transparent quotes that include debris removal and site prep, helping prevent hidden fees when moisture barrier repair or replacement is needed.
Is a thicker vapor barrier always worth it?
No. According to the U.S. Department of Energy, effective moisture control depends on proper assembly sealing, not just thicker plastic (2023). Higher vapor barrier pricing is wasted if your home actually needs targeted vapor barrier repair instead of heavier material.
Sources
- Analysis details benefits, costs of building energy-efficient homes – news.umich.edu
- How Much Does Crawl Space Vapor Barrier Cost? – The Pricer – thepricer.org (2025)
- Cost to Have Vapor Barrier Installed: Top 5 Proven Savings 2025 – basementwaterproofingscientists.com (2025)
- 2024 Cost of Vapor Barriers – Estimates and Prices Paid – CostHelper – home.costhelper.com (2024)
- Lower Energy Bills Can Start Below the Slab: How Vapor Barriers Help … – stegoindustries.com
Related reading: How to Cut Crawl Space Vapor Barrier Cost Without Surprises
Related reading: Attic Insulation Cost: How to Budget Smart and Avoid Hidden Fees
Frequently Asked Questions
What is the price difference between a basic crawl space liner and full encapsulation in Austin?
A basic vapor barrier typically costs between $1,200 and $4,000, while full encapsulation for chronic humidity ranges from $5,000 to $15,000. Super Green Insulation Austin provides transparent, no-obligation estimates to help you determine which moisture strategy fits your budget and foundation needs.
What hidden factors often increase the total vapor barrier installation cost?
Total costs often rise due to necessary site preparation like debris removal, mold remediation, or leveling the dirt floor to prevent punctures. Super Green Insulation Austin eliminates guesswork by including these details in upfront quotes, ensuring property owners avoid surprise fees during the installation process.
How do I know if I should pay for vapor barrier repair or a full replacement?
Repair is cost-effective for minor punctures in an otherwise intact liner, but full replacement is necessary if there is widespread tearing, pest contamination, or standing water. Super Green Insulation Austin offers professional diagnostics to identify if a simple fix or a complete system upgrade is the most durable solution for your home.
About the author
 |
Marcus Donovan Marcus Donovan is a certified energy auditor and home performance specialist with over 12 years of experience in the Austin construction industry. He holds a Bachelor of Science in Construction Management from Texas State University and focuses on residential and commercial energy efficiency. His practical knowledge covers everything from attic insulation retrofits to complex moisture control systems. |
Get started
Call Now - Free EstimateNeed Insulation Help?
Call Super Green Insulation Austin — licensed & insured, here with fast after-hours help in Austin.
(866) 434-2901